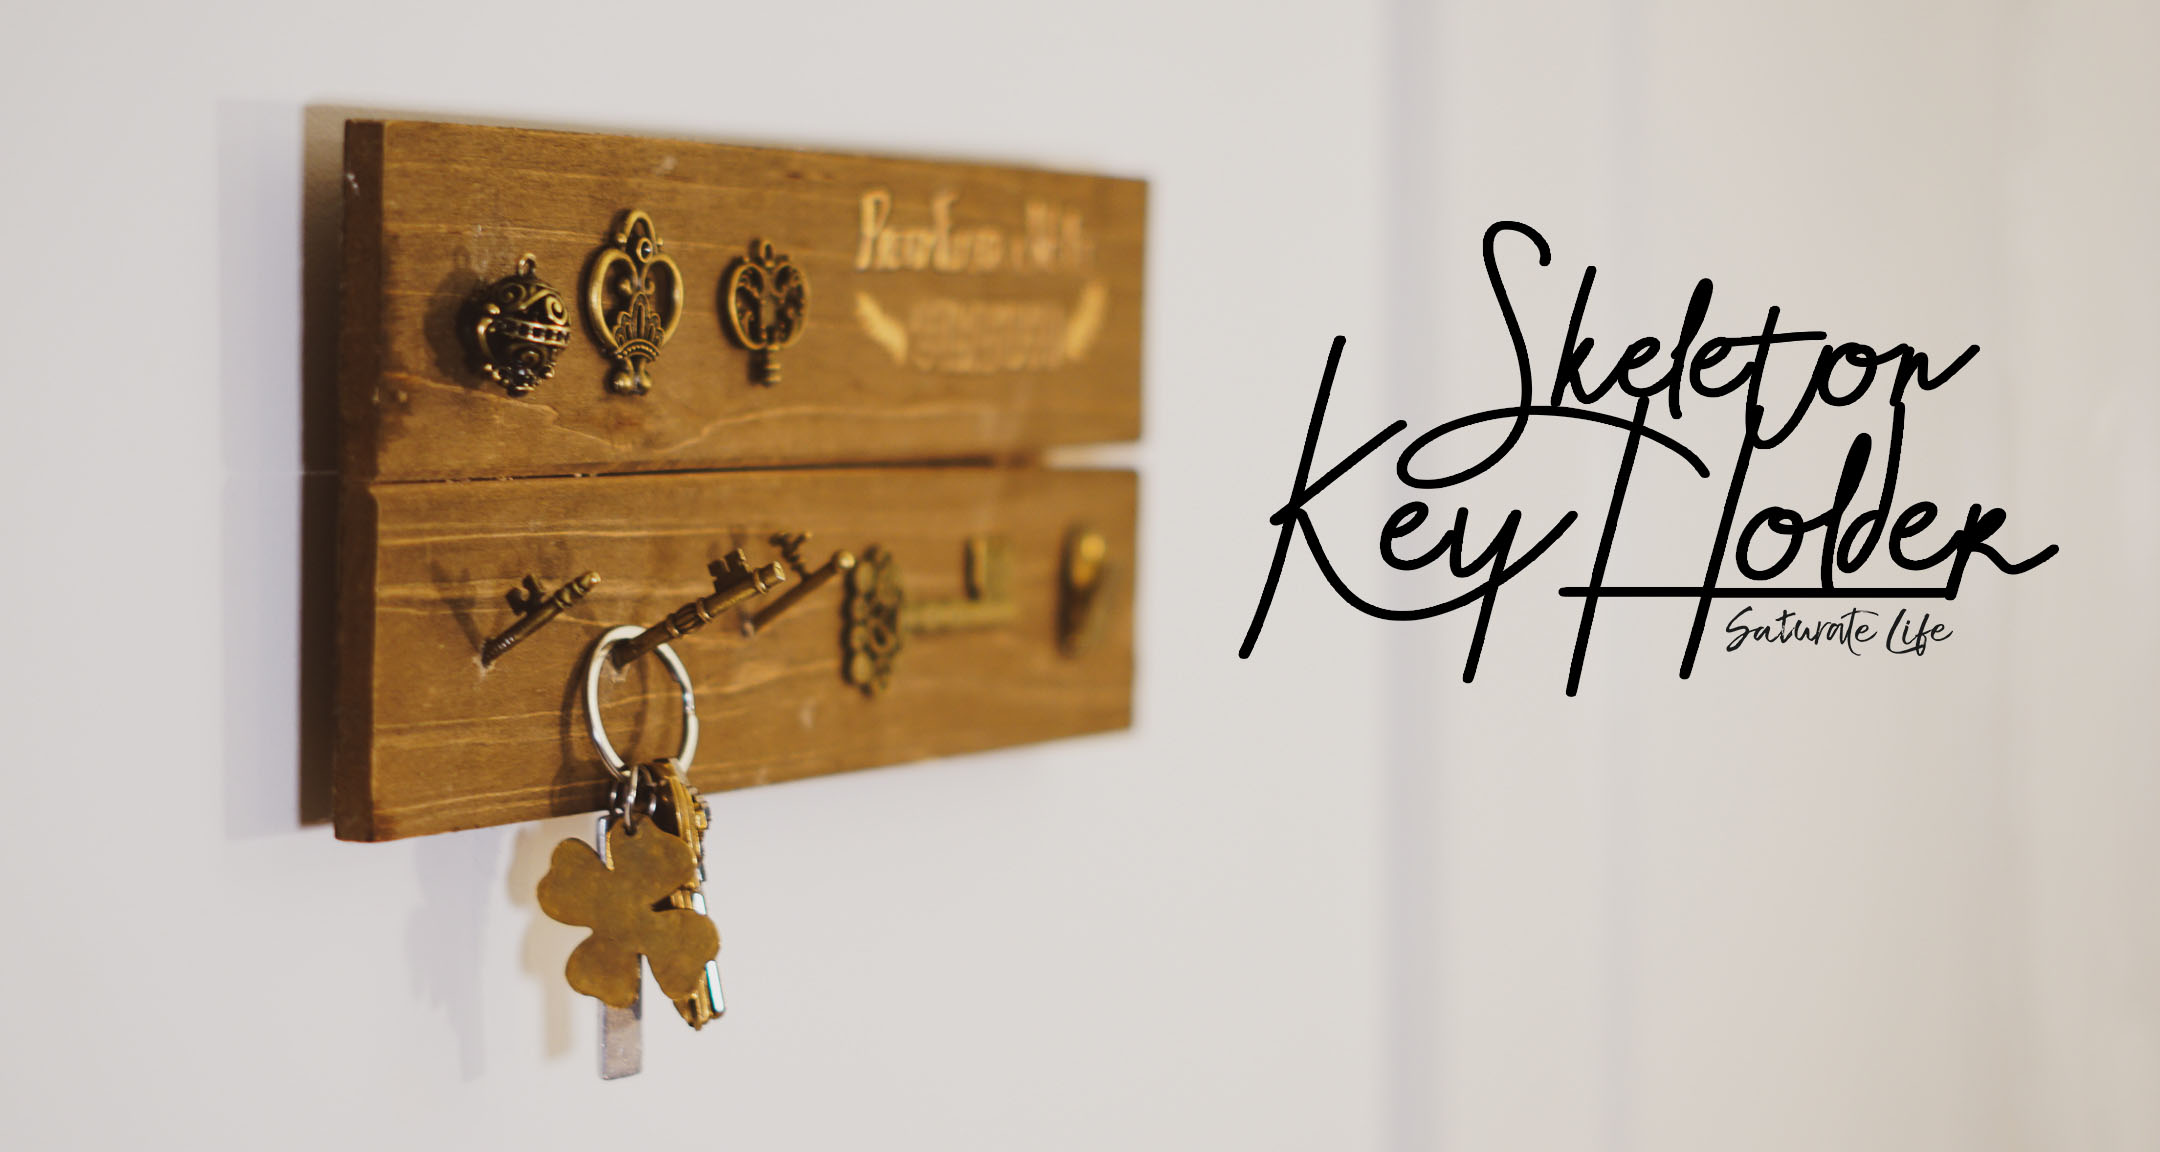
It’s difficult for me to leave the house. Not because I don’t want to, I just manage to lose everything that I need right as I’m leaving the house. The worst culprit are my keys. So I made a key rack. Specifically, I made a Skeleton Key Holder for the wall. I also enjoy the idea of form follows function. Thus rather than having the skeleton keys only fulfill the purpose of decoration I’ve prepared them so they act as the hooks themselves. This was an idea I’ve been harboring for a while, however, I wanted the most perfect solution with expert craft. This wound up with me still having no key rack and my keys winding up on the kitchen/bathroom counter, on the coffee table, near or in the abyss of my purse, etc. Hopefully, now I can change my habits and actually use the thing.
Skeleton Key Holder Materials
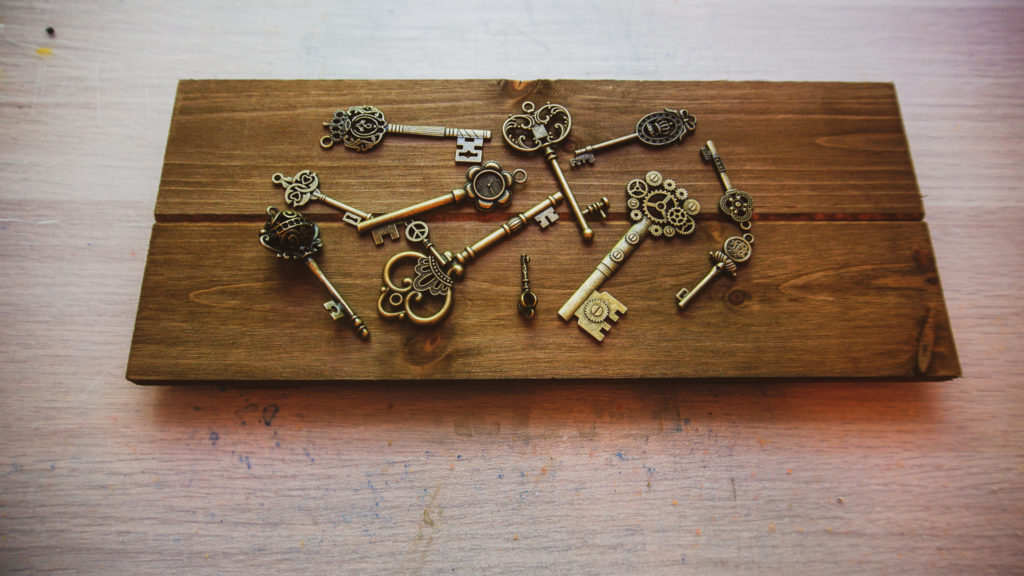
- Assorted Skeleton Keys – You can either find them or purchase an assorted packet off of Amazon. Be sure to check the sizes!
- Wood backing either made or bought
- Drill and drill bits
- Wood glue or craft glue
- Liquid Gold Leaf (optional)
Selecting Materials for the Skeleton Key Holder
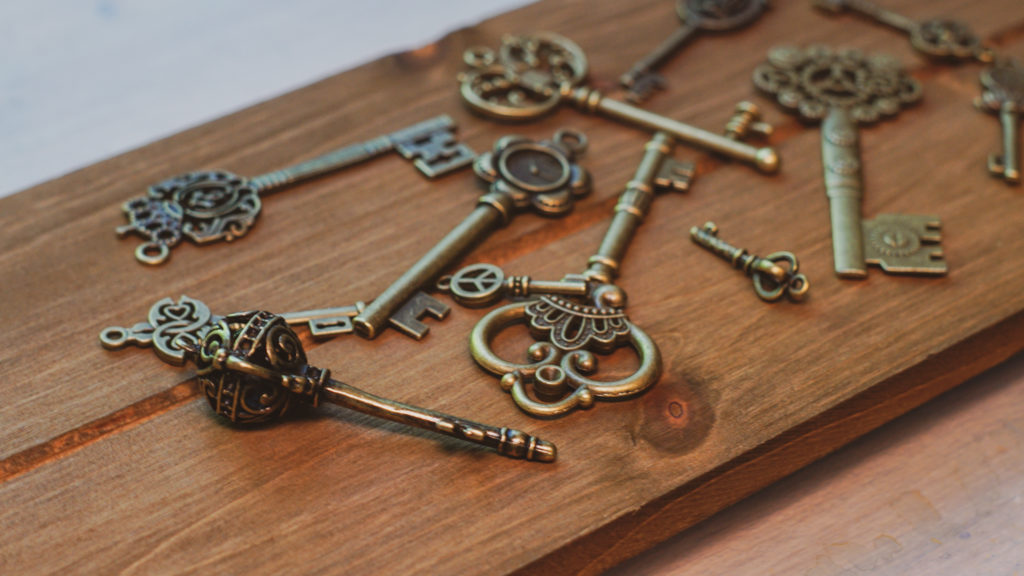
I have a lot of tools, but the only tool I have to cut a piece of wood without marring the edges is a hacksaw. Which is about as fun to use as gnawing through an entire head of celery. So I purchased a small wood panel to save myself some grief and time. This was just a simple set of boards with some furring pieces in the back to make it have some relief from the wall.
I purchased some skeleton keys off of Amazon. I tried searching for some in some antique boutiques but they were either tiny or not as decorative as I wanted. Honestly, I say the minimum would be around 3″. The keys I ordered off of Amazon came in a small pack where the largest was around 4″. Some had a flat back and some were fully round profile on all sides. I selected the three largest that were not flat.
Getting everything to fit
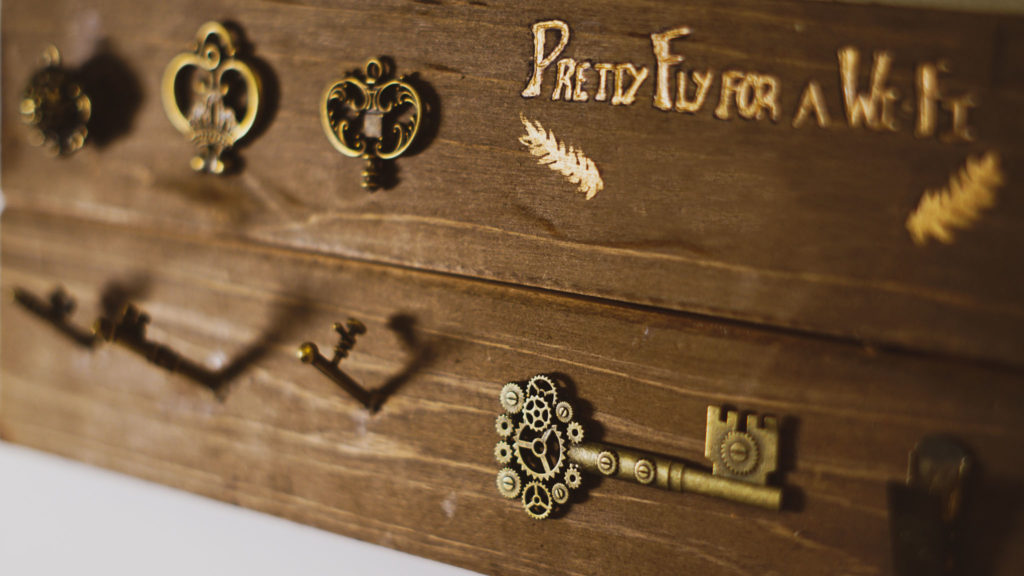
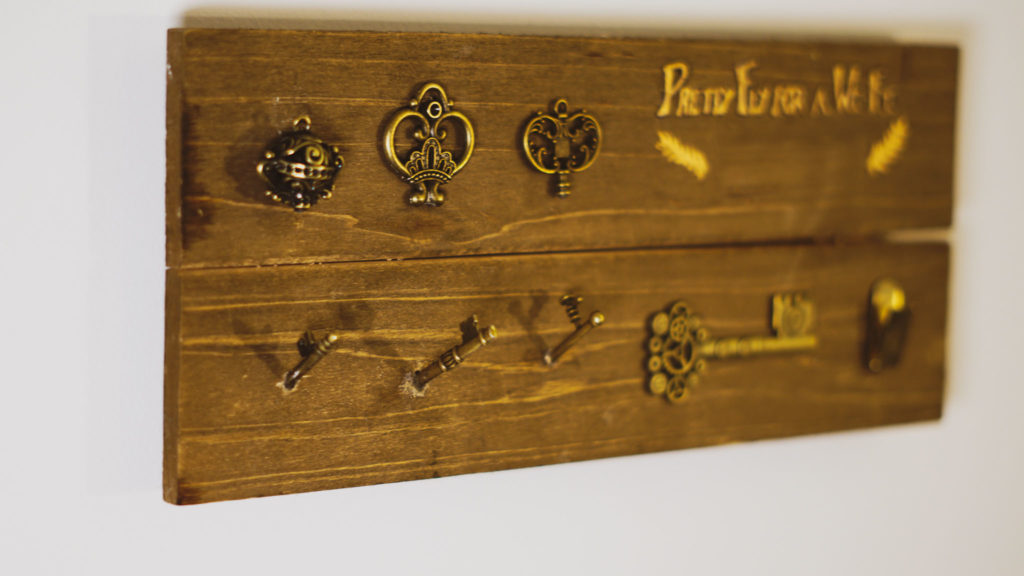
So the skeleton keys that came in my pack went as small as 1″ making them unusable for this project. Ultimately I only had three keys and a board where there would be an obscene amount of whitespace between the keys. I could have cut it down but at that point I might as well have cut the entire board out. Thus why would I even bother buying a prefinished board in the first place? So I worked with what I had. Instead, I had the idea to add in another key that everyone visiting asks for: my wifi key! We just had a piece of paper on the refrigerator so why not add it to my skeleton key holder as a quick and easy reference for guests? (Removed ’cause I don’t want the entire internet to know my Wi-Fi password)
Inscribing on the Skeleton Key Holder
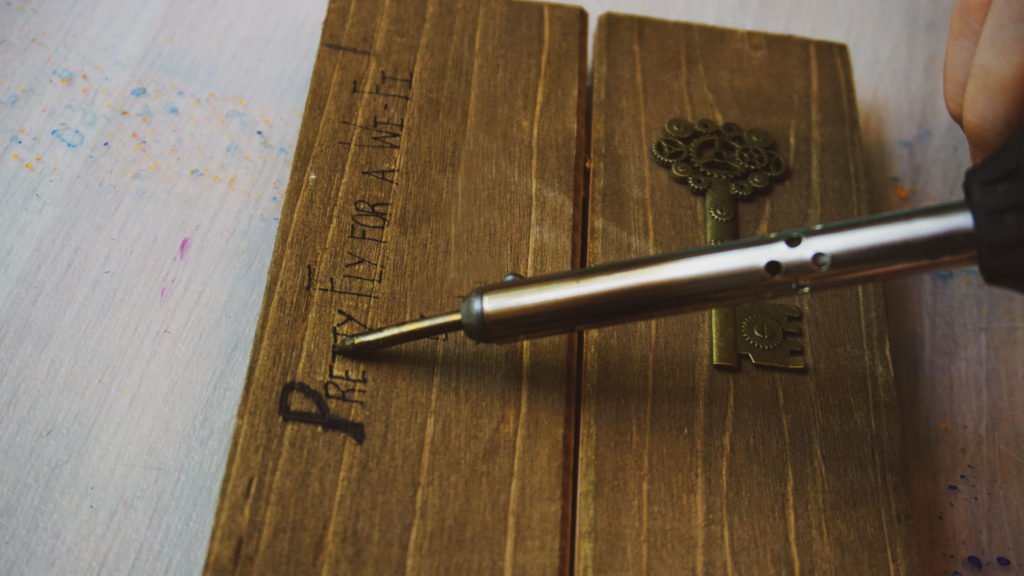
At first, I was trying to find different ways beyond just writing it on. So I tried to use my soldering knife. Which was a terrible idea. Not only did my apartment smell like burning I’m not good enough with it to write very legibly never mind pretty. Okay, so I brought out my cheap-o acrylic paint in white. Nope, now I burnt everything the charcoal mixed with the white and made it gray while almost highlighting how baaaaad the soldering knife mutilated my wood.
I didn’t want to do this to you guys. But remember my liquid gold leaf? I feel like I probably used it in just about every project since I bought it. Surprise! It’s back again. I painted over the white, outlined it in pen, and added some accents.
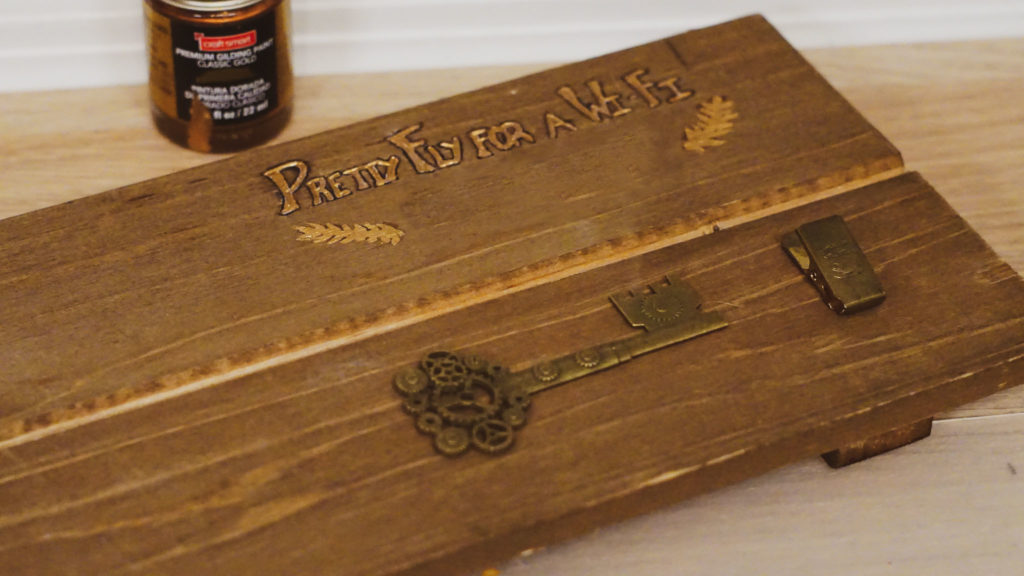
In my defense, the gold metallic paint covers up my mistakes fairly well… which was the point. Some other things I added to this side of the panel included another one https://saturatelife.com/diy-inspirational-wire-lettering-decorof the keys to as decoration and a small brass clamp I had from some fancy coffee that could hold paper reminders or bits of mail.
Preparing the Skeleton Keys
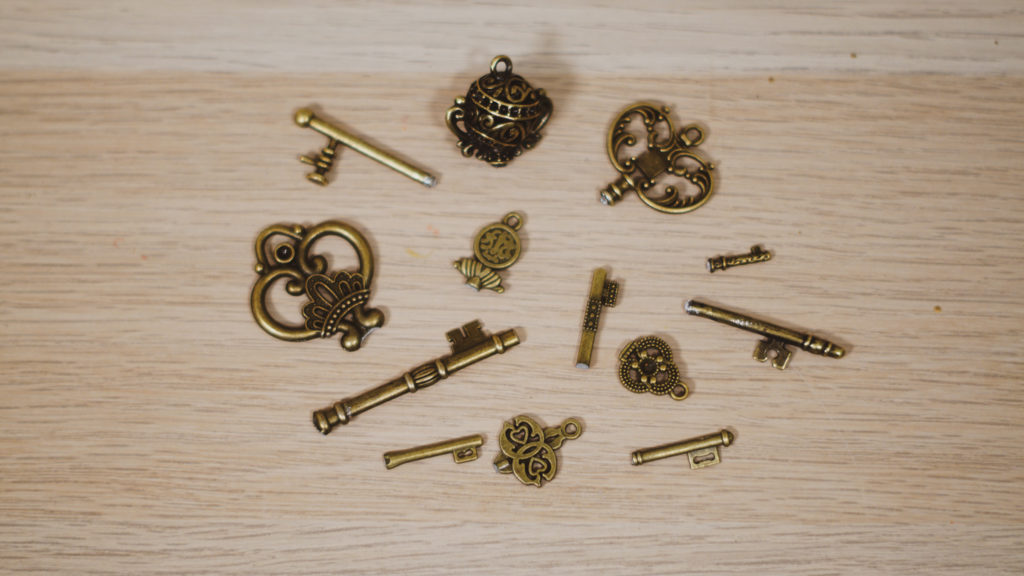
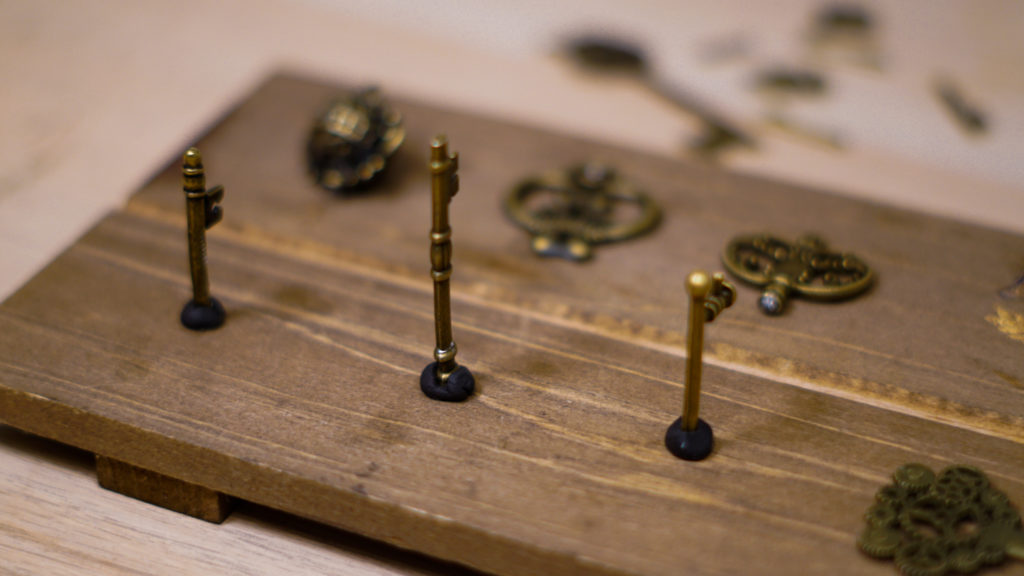
In order to make the keys behave as hooks, I was debating what would be the best way to display them. Ultimately I wanted the literal keys to be the hooks rather than just using them as a frivolous ornament with some hooks on the bottom. I thought about cutting some wood accent that the skeleton keys would insert into (see my comment about a hacksaw why I didn’t go with this). I was going to squish them into clay and glue the clay on which looked bulky and quite frankly ugly. At this point I was lamenting to Fitzi about what to do (read: whining). He suggested that I cut off the key heads and use the necks.
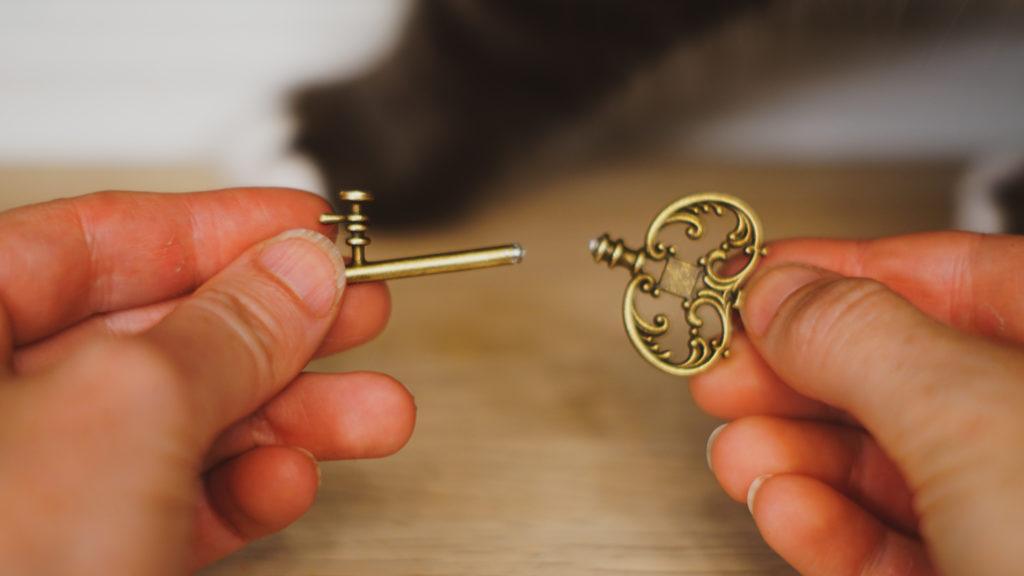
I was under the impression that these things would be too hard to separate so I was hesitant to break my wirecutters trying. Fitzi in all his immense strength picked up one of the smaller ones in the set and cleanly snapped off the head. Fine whatever. I’m not going to suggest something that will require superhuman strength to accomplish. So I picked up another one with my weak girl arms and tried. I was able to snap off the head as well surprisingly easy peasy lemon squeezy. The metal that was used to create these keys is pretty low quality with a fault line typically right underneath the head.
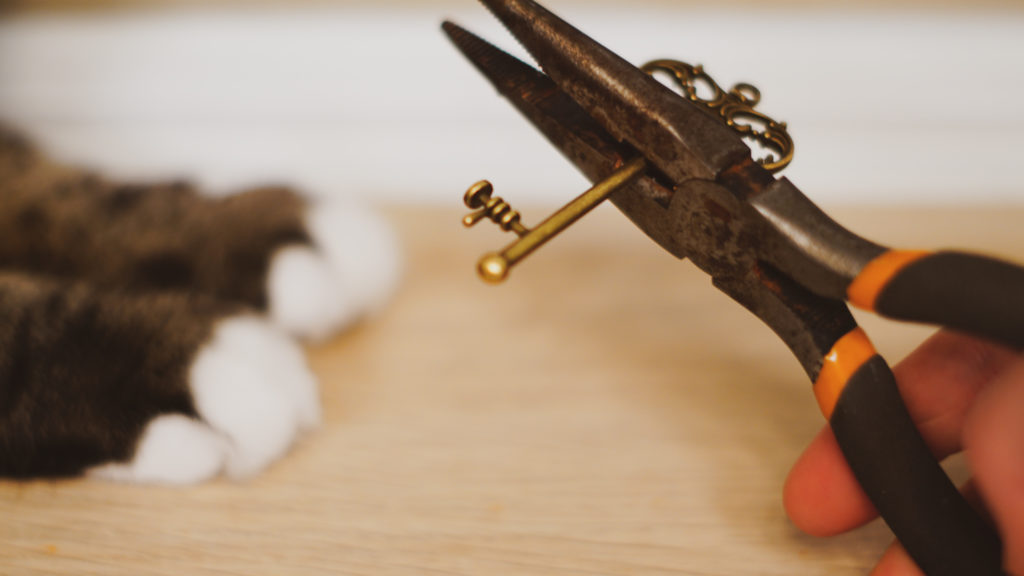
Well, these keys were only for decoration so I suppose it makes sense. Some of the skeleton keys may require some pliers to get the right spot but wiggling the metal back and forth will weaken the metal easily. Your experience may differ if you choose to scrounge up some literal skeleton keys instead. Save both the head and the neck of the keys.
Getting Hookey with the Skeleton Key Holder
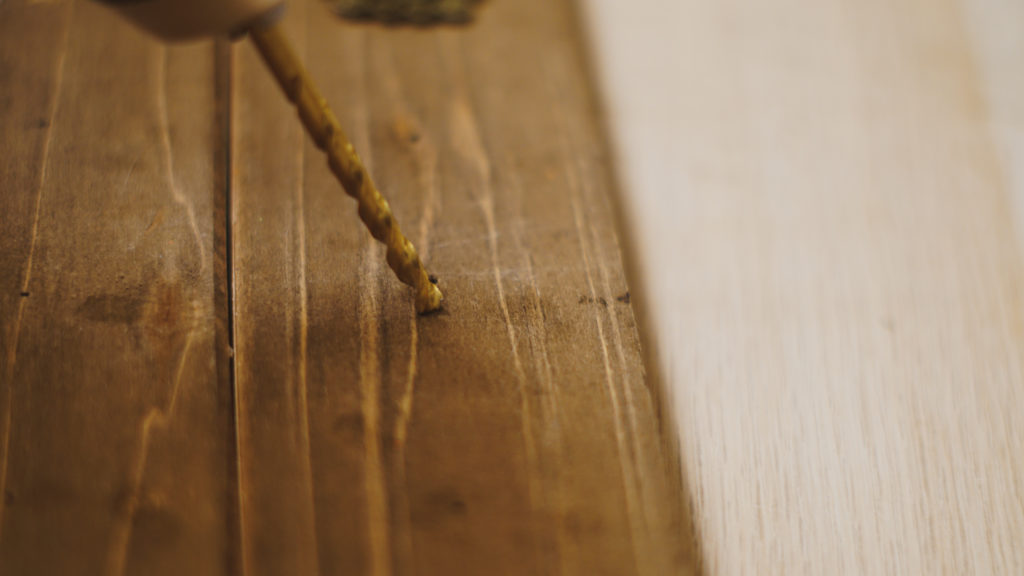
Since the keys were now in pieces. I chose a composition and it was time to actually attach the keys to the board. Unfortunately, it was not as easy as just gluing the thing to the other thing. In order to make sure the hooks can support the weight of my keys, it gets slightly more complicated with a few more tools.
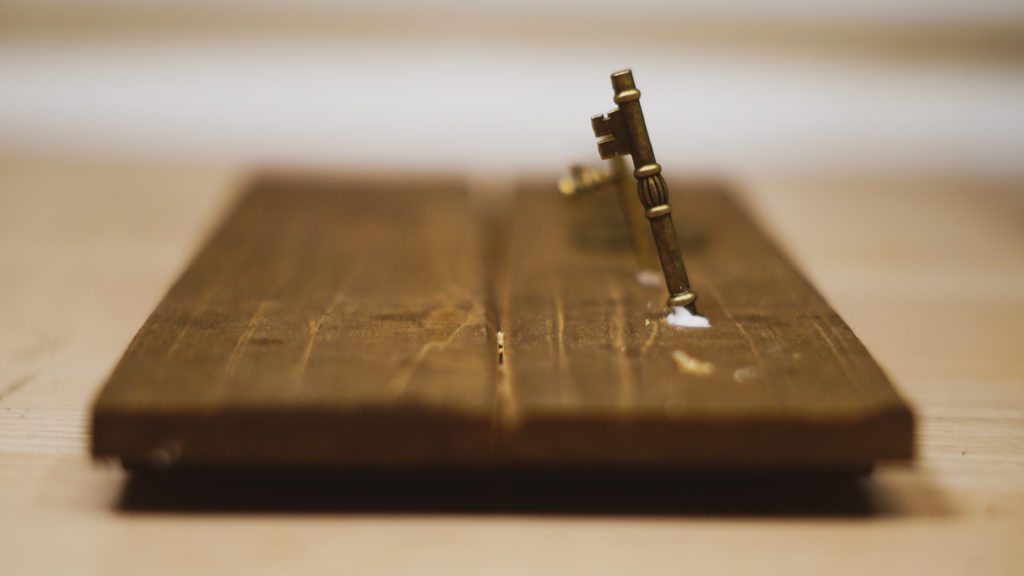
First I predrilled a few holes into the board. Choose a drill bit in a size slightly smaller than the diameter of the newly chopped off key neck. In order to get the best use of the keys, the holes should be drilled at an acute angle to the board so the skeleton key necks will angle upwards. Place some glue on the end of the key neck ( I used my favorite super thick sticky tack glue, click here to read more about my ranting about the importance and purposes of various types of glues) and jamb the neck in the hole. This may require some force. The glue is for security but mostly we are relying on friction and the key getting stuck in the board to keep it in place.
The Final Touches for the Skeleton Key Holder
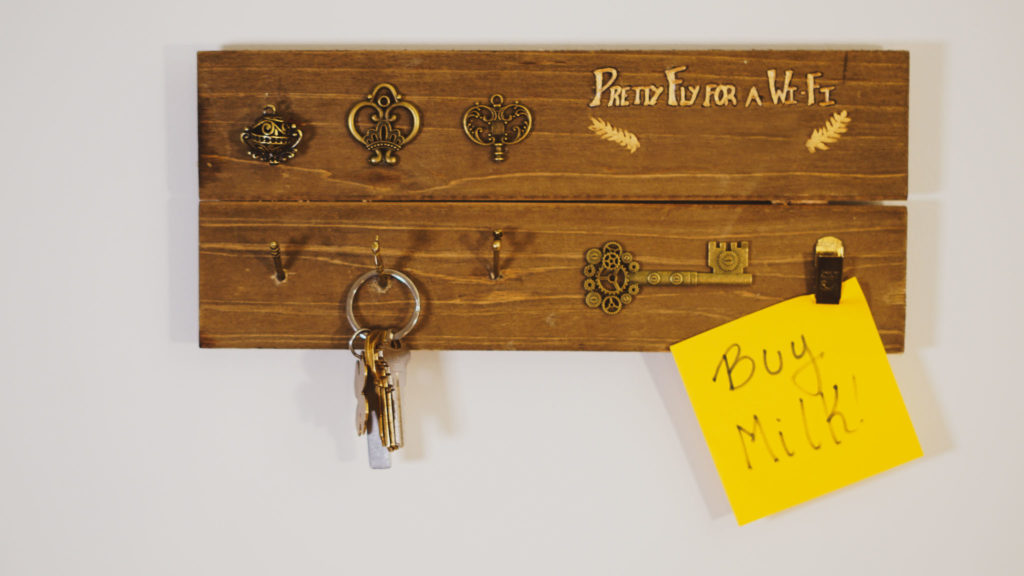
The heads of the keys will be once again used like they were previously, as decorative elements. They were aligned with the necks below and glued in place. I decided to hang the key holder on the wall by the door where I think that I would be more likely to use it. We had a key rack to the right of the door as you’d exit, but as I arrived home I would never get into the habit of turning around to place my keys on this rack.
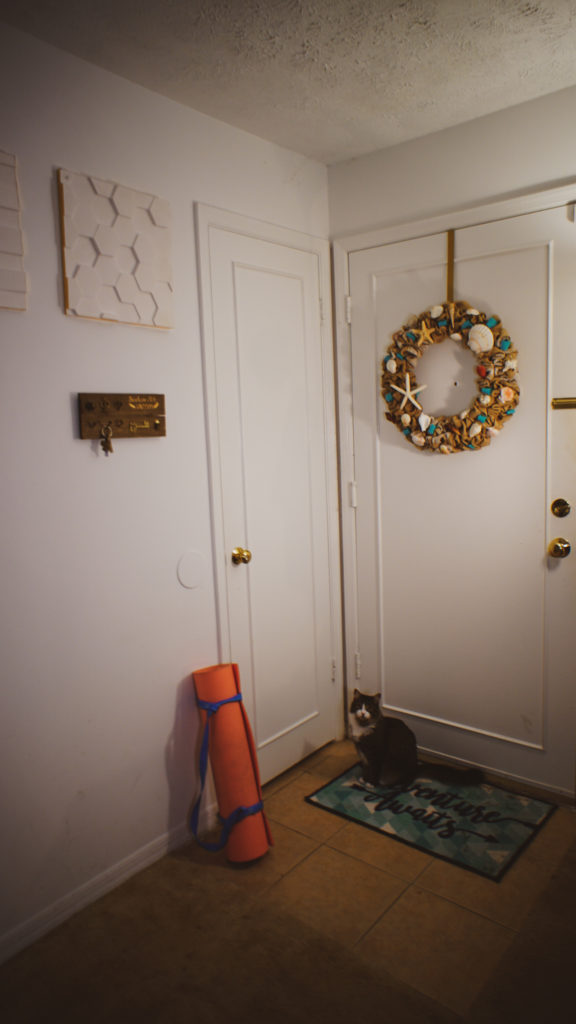
(Remember the Yoga Mat Sling for under $5 and the DIY Burlap Wreath I made a while ago?)
I placed my rack was right at the edge of the swing of the door which means I see it as I enter and it feels more natural for my right-handed self to complete the action by reaching out and placing the keys on the rack as I enter. Sometimes the way to develop a habit is to make things more aligned with your own natural cadence.
Trial and Error with the Skeleton Key Holder
- Go with the Flow– There were a few bones thrown at me as this project unfolded. I learned to roll with them as they arose, that is the biggest key (ehehehe I went there) to me being so thrilled with it.
- Practice with new techniques before committing to them– Whelp I wanted to burn in the Wifi name and code but that part stunk because I am not very experienced with that type of delicate work with a sodering knife.
- Turn it upside down– This isn’t a literal thing, but it’s more about the idea of looking at things from a different perspective (i.e. upside down) It didn’t really cross my mind that I could break apart the keys so I never thought about them being separate. Instead, that was the entire means of getting the project to work out.
Thank you for stopping by my blog and looking at my tutorial for a Skeleton Key Holder! Please come back soon!


